How to Use Railgun for Shielded DeFi Swaps: A Step-by-Step Guide

Shielded DeFi swaps allow you to privately exchange tokens (e.g., ETH → USDC, DAI → WETH) without exposing amounts, counterparties, or trading patterns on the public blockchain. This is especially valuable in an era where Chainalysis clusters 82% of Bitcoin transactions and regulators increasingly demand transaction tracing.
“Railgun brings privacy to DeFi without sacrificing composability or decentralization.” — Railgun Official Documentation
This step-by-step guide covers everything you need to start using Railgun via the Railway Wallet (the most user-friendly interface in 2026). We’ll walk through setup, shielding funds, performing private swaps, unshielding, best practices, risks, and what to expect in the coming years.
Prerequisites
Before you begin, make sure you have:
- A compatible wallet (e.g., MetaMask) with funds for gas and initial shielding
- Supported chain: Ethereum mainnet, Arbitrum, Polygon, BNB Chain (check railway.xyz for the latest list)
- Railway Wallet installed: web app (railway.xyz), iOS/Android mobile, or desktop version
- Basic understanding of DeFi: approvals, gas fees, slippage
Fees to expect: 0.25% for shielding/unshielding, variable gas costs, and broadcaster fees (~0.25–0.5%) for relaying private transactions.
Step 1: Set Up Railway Wallet
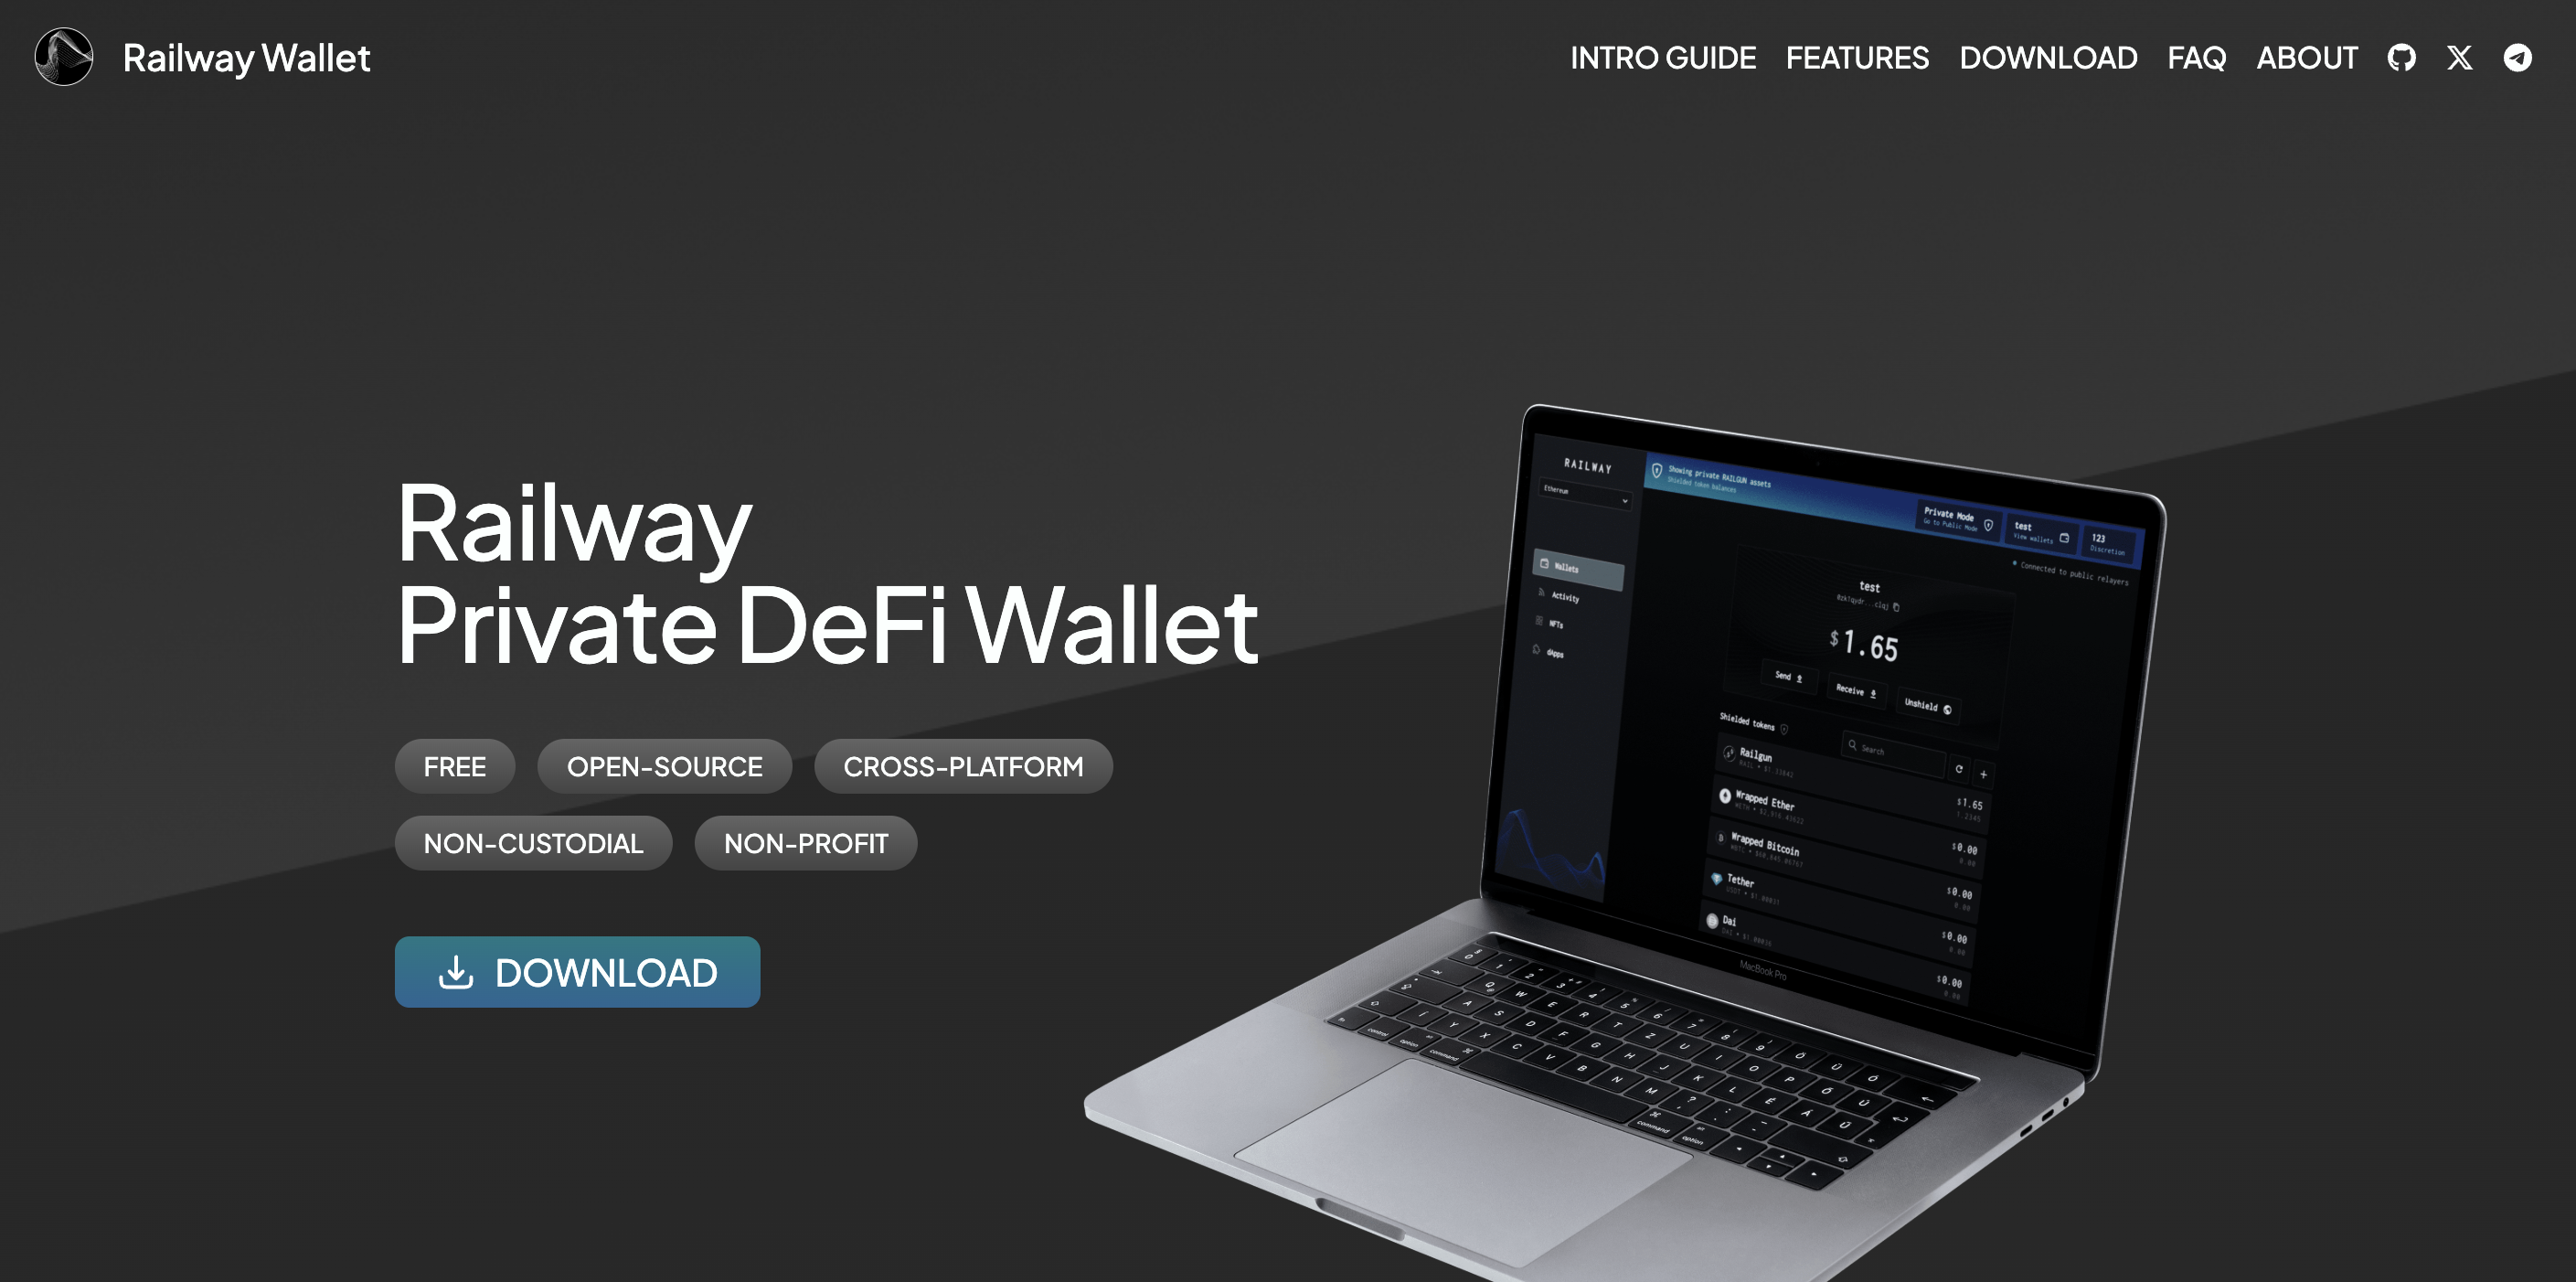
- Go to railway.xyz or download the app from the official links (App Store, Google Play, or desktop).
- Click “Create New Wallet” (or “Import Wallet” if you already have a seed).
- Securely back up your 12/24-word mnemonic seed phrase offline — this is critical.
- Set a strong password for the app.
- Connect to your preferred chain (e.g., Ethereum mainnet) using the network selector in the top bar.
- Send some base token (ETH, MATIC, BNB, etc.) to your public 0x address shown in Railway. This will be used for gas and initial shielding.
After setup you’ll have two types of addresses:
- 0x… — public Ethereum-compatible address (visible on-chain)
- 0zk… — private shielded address (encrypted, only you can see balances)
Step 2: Shield Assets into Private Balance
Shielding moves tokens from your public 0x address into the private Railgun pool.
- Open Railway and make sure you’re in “Public” mode (toggle at the top).
- Select the token you want to shield (ETH, USDC, DAI, WETH, etc.). If it’s not listed, import it by pasting the contract address.
- Click “Shield”.
- Choose the recipient: usually “My Wallet” (your own 0zk address) or paste another private address.
- Enter the amount and review the summary (0.25% shielding fee + gas).
- Confirm with your password and submit. Adjust gas settings if needed via the “Network Fee” slider.
- Switch to “Private” mode to see your newly shielded balance appear.
Note: Newly shielded funds have a 1-hour “unshield-only” period as part of Railgun’s Proof of Innocence mechanism — during this time you can only unshield back to the original sender address.
Full on-chain privacy for future actions
Composable with DeFi protocols
No KYC required
0.25% fee on shield/unshield
1-hour lock for new shields
Gas costs can add up on Ethereum mainnet
Step 3: Perform Shielded DeFi Swaps
Once funds are shielded, you can trade privately using Railway’s built-in DEX interface (powered by 0x aggregation and Railgun adaptors).
- Switch to “Private” mode in Railway.
- Go to “dApps” → “Railway DEX” (or the integrated swap tab).
- Select your “From” token from shielded balances and the “To” token you want.
- If the target token isn’t listed, import it by contract address.
- Enter the swap amount. If this is the first time trading this token privately, click “Approve” (approves only the exact amount for safety).
- Review the quote (aggregated from DEXs like Uniswap, SushiSwap, etc. — executed privately via Railgun).
- Confirm fees: gas + broadcaster fee + 0.25% unshield fee on the temporary public portion.
- Enter password and submit. The entire operation (unshield → swap → re-shield) happens in one atomic transaction.
- Check your updated shielded balance after confirmation.
Example: Shield 500 USDC → privately swap to WETH → receive shielded WETH. No public trace of the trade.
Step 4: Unshield Assets (Optional)
- In “Private” mode, select the shielded token.
- Click “Unshield”.
- Enter the public 0x address where you want to receive the funds (yours or another).
- Specify amount and confirm.
- Review fees (0.25% + gas) and submit.
Best Practices & Tips (2026)
- Always test with a small amount first (e.g., $10–50) to understand fees and flow.
- Use hardware wallets for seed backup and high-value operations.
- Pay broadcaster fees from shielded stablecoins to avoid needing public ETH.
- Use Layer-2 chains (Arbitrum, Polygon) for lower gas costs.
- Combine with VPN/Tor for full IP privacy.
- Never reuse public addresses across different privacy strategies.
Risks to Be Aware Of
- Smart contract risk — Railgun is audited, but no protocol is 100% safe.
- Regulatory scrutiny — privacy tools remain a target in some jurisdictions.
- Fee accumulation — multiple shields/swaps can become expensive on L1.
- Wallet security — seed phrase compromise = total loss.
Outlook: Railgun & Privacy DeFi in 2027–2030
Messari and BCG project that privacy protocols will handle 25–35% of DeFi volume by 2030, driven by zk-tech maturation, RWA tokenization, and demand for discreet settlement. Railgun is well-positioned with multi-chain support and growing integrations.
Final Thoughts
Railgun via Railway Wallet makes shielded DeFi swaps accessible and powerful. Shield once, trade privately forever, unshield only when needed. Start small, prioritize opsec, and you’ll keep your DeFi activity truly private in 2026.
Have you tried Railgun swaps yet? What’s your favorite shielded strategy? Share in the comments below.